A few months ago, I’ve shared the work we’ve done in Babylon.js v3.0 to create WebVR experiences: from zero to hero, creating WebVR experiences with Babylon.js on all platforms. I was quite happy of the job we’ve done but it wasn’t as simple and powerful as I first imagined. That’s why, I’ve quickly started to work on a new feature for v3.1 I’ve named VRExperienceHelper to make the life of WebVR content creators much simpler. Babylon.js v3.1 has just shipped, to know more about this release, check this blog post: announcing Babylon.js v3.1.
Basically, I’ve integrated most of the code & ideas shared in the previous article directly in the engine. Thanks to that, it’s now very straightforward to enable VR on all platforms, add interactions with controllers and/or teleportation. Let me show that through this small tutorial. You will even learn how to create a WebVR scene using Paint3D!
Prerequisites
We will use our Mansion scene as a starting point. Open this sample in your browser: https://playground.babylonjs.com/#HARNA9 that will show you how to load a Babylon.js scene.
This scene has been entirely done with our 3DS Max exporter, including integration of 3D spatial sounds using Web Audio. It also embeds the usage of our Actions Manager.
We’re now going to use the VRExperienceHelper. You can check our documentation on this new feature.
Swiching to VR
In Babylon.js, enabling VR on all platforms is just about this line:
var VRHelper = scene.createDefaultVRExperience();
The helper will then:
– add a HTML button on the bottom right of the WebGL rendering canvas
– check if WebVR is supported on your platform
– by default, replace the current active camera by a Device Orientation camera, using the active camera position. This can be changed in the options passed to the constructor by setting {createDeviceOrientationCamera:false}
Using the previous sample, if you had this magic line, you’ll ended up with this code sample: https://playground.babylonjs.com/#HARNA9#1
If you open it on a smartphone or a device with motion sensors, you’ll see you can already rotate the camera by moving the device around you.

Clicking on the VR button will:
– Enter VR in your headset if you’ve got one and render in stereo. If you’ve got controllers, it will download their associated models from our CDN. In v3.1, we’ve got a default support for Windows Mixed Reality spatial controllers, Oculus Touch and HTC Vive. If your device is not part of this list, we will display a generic model for it.
– If your browser doesn’t support WebVR, or if it does but no headset is connected, we will fallback to our VRDeviceOrientation camera for a carboard like experience.
Note: Windows Mixed Reality spatial controllers are using glTF models. Don’t forget to reference the glTF extension after referencing babylon.js. This extension can be found here and its documentation there.
Enabling interactions
Enabling interactions is just about 1 line of code:
VRHelper.enableInteractions();
The VRExperienceHelper will then create a cursor that will follow your gaze if you’ve got no VR controller, like using an Xbox gamepad on desktop or using a mobile VR solution. The experience will be identical as the one we’ve created in the Windows Mixed Reality Portal, also known as the Cliff House.
Adding this line to the previous sample will create this demo: https://playground.babylonjs.com/#HARNA9#2
You can watch the result in this video:
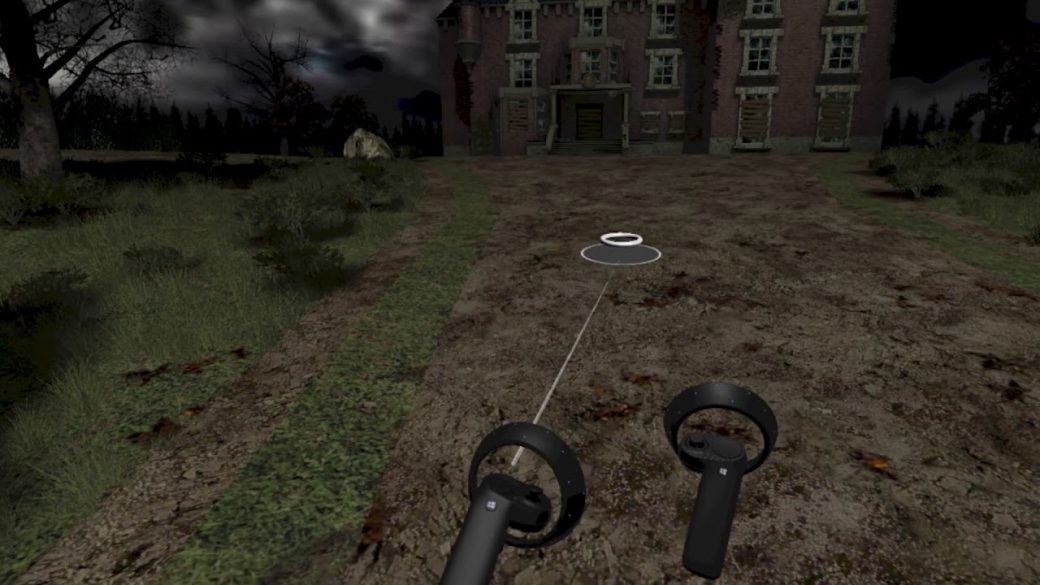
First, you’ll see the usage using a regular Xbox gamepad. You can notice that the gaze cursor is precisely following every facet of the mesh looked at. Try for instance looking at the floor and at one of the walls of the mansion and you’ll notice it slightly changes (moving to horizontal to vertical) to give you the right feedback, exactly as inside the Windows 10 MR Portal. As I really liked the UX of the Cliff House, I’ve decided to mimic it as much as possible.
When looking at the circle mesh on top of the door of the mansion, the gaze cursor will change from white to blue and will become bigger. This is to indicate to the user he can launch an action associated to this mesh. To trigger it, simply press the A button of the gamepad while looking at it.
In the second part of the video, I’m powering one of my VR controllers. You’ll see that immediately after loading the associated model, a pointing laser will go out of the controller and will use the gaze cursor as the new pointing target. If you’ve got 2 controllers and you’d like to display the laser pointer to the other one (if you’re left handed for instance), simply press the main button of your controller to activate/deactivate it on the desired controller. On Windows Mixed Controller and HTC Vive, the main button is the grab button and on Oculus Touch, it’s the A button. To trigger an action, use the trigger button of the controller.
Let’s see another cool sample. Please load this Playground sample: https://playground.babylonjs.com/#PVM80T and review quickly the code. It shows how to use our GUI layer to build UI directly in the 3D space, which is mandatory to build UI in WebVR.
You can click on the button, radio buttons and the color picker using the mouse or touch. You’ll see also that changing the value of the color picker will change the color of the small sphere near it. We’re using the Pointer Events specification to support all type of inputs. In VR, we’re simulating those same pointer events inside the VRExperienceHelper to build interactive UIs in a seamless way. In a nutshell, this means that once your UI works in 2D using mouse or touch, in will work in VR.
Let’s transform this second sample in VR with interactions enabled by adding the same 2 lines of code we’ve seen previously.
You’ll ended up with the same code as: https://playground.babylonjs.com/#PVM80T#1
Have a look to the result in this video in VR:
At the beginning, I’m only using the Xbox gamepad again to click on the button & radio button. You see also that we’re simulating pointer move if you keep pressing the A button while moving your gaze on the color picker. In the second part, I’m either using the right or left controller to play with the UI using the laser pointers.
If you’d like to see how to implement a gaze selection based on a timing approach for mobile VR solutions for instance, please have a look to this sample: https://playground.babylonjs.com/#5P51YL
Building a fruit ninja like game
I’ve made a complete gaming sample to show you how to build a Fruit Ninja like game in WebVR. You can see the result in this video:
During //BUILD 2018, I’ve shown you how to create this game using the following samples code:
– 2D (non-VR) version of the game: https://playground.babylonjs.com/#22KIIK
– How to switch VR controllers from their default models to laser saber: https://playground.babylonjs.com/#IY99P5#4 and activate glow on a button
Play to the game: https://playground.babylonjs.com/#22KIIK#4 which mixes all those samples together. You can even play it using mouse or touch even if it’s much less funny than in VR!
I’ve tried to comment the code as much as possible to make it clear, so please read it. ![]()
Features:
– GUI in VR like seen just before
– how to enable/disable the gaze/laser pointers while in game
– how to switch the models of the controller from the default one loaded from our CDN to a laser saber found on Remix3d and vice versa.
– how to manage collisions between the laser saber and the fruits using the Action Manager.
– Web Audio, nice particles effects, etc.
At last, I’ve built a PWA version of this game available there: Apple Crusher PWA
Enabling teleportation
Finally, enabling teleportation is again just about 1 line of code:
VRHelper.enableTeleportation({ floorMeshName: "NameOfTheMesh" });
Once used on the previous Mansion scene we’ve used, you’ll have this code: https://playground.babylonjs.com/#HARNA9#3
Again, the VRExperienceHelper is providing for free a lot of cool UX features, inspired from the Cliff House experience. To teleport, on Mixed Reality/Oculus Touch/Xbox gamepad, move the thumbstick forward or press up the touchpad of the Vive to display the teleportation target. Move it where you’d like to go using gaze or the laser pointer of the controller. On release, you will be teleported on the point you’ve selected using a specific animation timing. You’ll notice also we’re reducing the FOV (Field of View) during the animation to avoid motion sickness using our vignetting post-process.
You can also move a step backward using the thumbstick/touchpad down and rotate left/right the camera by 45 degrees.
Bonus – build VR scenes with Paint3D and Remix3D
If you’ve got a PC running Windows 10 Fall Creators Update, you can use the great 3D models available on http://www.remix3d.com, build a scene inside Paint 3D and export it to glTF (.GLB) format. Then making a WebVR version out of it using Babylon.js is very simple. Let me show you how.
First, select your favorite assets from Remix3D.com. On my side, I’ve chosen those characters: Gabe (Yeti), Saul the Snowman, Grey wolf – low poly, Unicorn, Smiling Sun, Fireworks 1, Fireworks 2 and I’ve decided to use this cool island to put the characters on it: Snow Patch. It will also be used for the teleportation area.
Start by opening “Snow Patch” in Paint 3D, scale it bigger and then add the various other assets. You should obtain something similar as:

Now, we’re going to paint a floor on top of the island that will act as the teleportation mesh for the VRExperienceHelper. Move the camera to view your scene from above, like you’re looking from the sky vertically:

Select 3D doodle – Sharp edge to draw the shape where you’d like to teleport onto:

You will then have a mesh model on top of the Island. Reduce the height and try to set the position as close as possible to the ground.


Now, export your work to .GLB :

Next step is to check the name of the red 3D doodle mesh. For that, take the .glb file you’ve exported and drag-n-drop it inside our Babylon.js Sandbox tool: https://sandbox.babylonjs.com/ :

Using the babylon.js debug inspector (middle button available on the lower right of the screen), find the 3D doodle mesh you’ve created. In my case, it’s named “mesh_id81”.
We’re now ready to use this Paint3D scene in WebVR. Babylon.js WebVR sample using the VRExperienceHelper and this Paint3D scene: https://playground.babylonjs.com/#513Z88.
Reading the code, you’ll see I’m just scaling the world to have a better ratio for VR and enabling teleportation on mesh named “mesh_id81” as explained just before. I’m also making it non visible.
Check this video that shows the experience inside the headset:
I hope you’ll be able to create your own Mixed Reality world or experiences in an easy way thanks to Babylon.js v3.1. Feel free to share your creations and/or questions & feedbacks to the team on our forum.
David
salut,
superbe article comme toujours bien détaillé.
J’en ai regardé plein d’autres ainsi que votre cours babylon sur le site de microsoft.
J’ai voulu testé le module Web VR avec mon oculus rift + Touch .
Malheureusement, cela ne fonctionne pas sur chrome.
Et sur Firefox, ça fonctionne presque… Les contrôleurs touch et le head tracking sont reconnus mais l’écran de l’oculus se redirige obligatoirement sur le oculus home. J’utilise firefox nightly.
https://forums.oculusvr.com/community/discussion/41823/webvr/p2
Et pour edge, je suis sur windows 7…
Lionel
J’ai finalement trouvé une solution pour l’affichage sur le rift.
Eviter que l’oculus home ne démarre automatiquement quand on met le casque sur la tête.
Par exemple en forcant OculusClient.exe a s’ouvrir en mode administrateur.
Fermer oculus home, ça marche dans mon cas donc avec firefox nightly59.
Bonjour,
Merci pour votre retour. Effectivement Chrome ne supporte pas encore WebVR par defaut dans les builds publics. Par contre, je n’ai jamais eu de souci avec Firefox et Oculus mais j’ai fait mes tests dans des builds stables (Firefox 55/56 & 57).
Avez vous pu tester sur des builds stables plutot?
David
Oui je viens de tester sur firefox 57 et ça fonctionne aussi.
Lionel