Did you already have some cool videos that you’d like to share or keep but were sometimes too shaky because of the way it has been done? Thanks to new cool algorithms, you can now fix them after the shooting with post-processes effects. And trust me, the result is really impressive!
For instance, look at the 2 videos below:
On the left, this is the original video taken directly from the drone, on the right, the stabilized version built with the Microsoft Cognitive Services (former known as Project Oxford) video stabilization feature. You can view it in a separate tab by opening this link also.
Note: I’ve built a small HTML5 custom video player by refactoring this github project. Please note also that the synchronization algorithm between the 2 videos is not perfect and you’ll need to view it on a desktop machine as most of the smartphones can’t play embedded videos not in fullscreen.
Drones are damn cool
As lot of geeks I guess, I’m passionate about everything linked to drones. It started when I was a child. My grandfather was working for Dassault during the day and was building awesome reduced model of planes, boats, cars or trains during his spare time. The most impressive models (and expensive) were the helicopters. There were also very difficult to pilot. Today, thanks to the magic of hardware and software innovations, drones offer a lot of fun and are relatively easy to pilot.
Top masters can achieve amazing stuff like this Drone Racing League competition:
There are many drones available on the market today and I frequently hear about 2 famous models: the Phantom and the Parrot models.
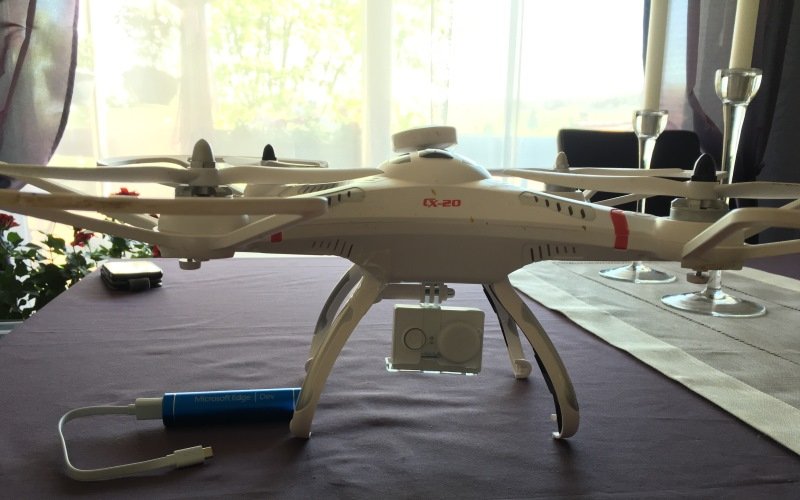
On my side, I’ve got a Cheerson CX20 drone which is a famous “Phantom clone” and much cheaper. Search for it on your favorite search engine or on YouTube, you’ll see how it’s cool.
After flying different times with it, I’ve decided to try shooting some videos with a small Xiaomi Yi camera plugged into the default mount shipped with the drone. There are better options like using a 2-axis brushless camera gimbal that will stabilize a bit the camera but I had trouble using it as you can see in this video I’ve done with it, so I’ve decided to first start using the default mount.
Thanks to that, I’ve managed to shoot my first videos from my drone without important issues. I was so pleased about that! 🙂 But then, I saw that my videos were really shaky…
Stabilizing videos: from Hyperlapse to Microsoft Cognitive Services
Hopefully, there are some powerful algorithms that can now help us fixing that.
On the Microsoft side, it started with the Hyperlapse project from Microsoft Research. You can use it to stabilize a video by using a speed of X1 rather than trying to create a time-lapse version of it and it will do the job.
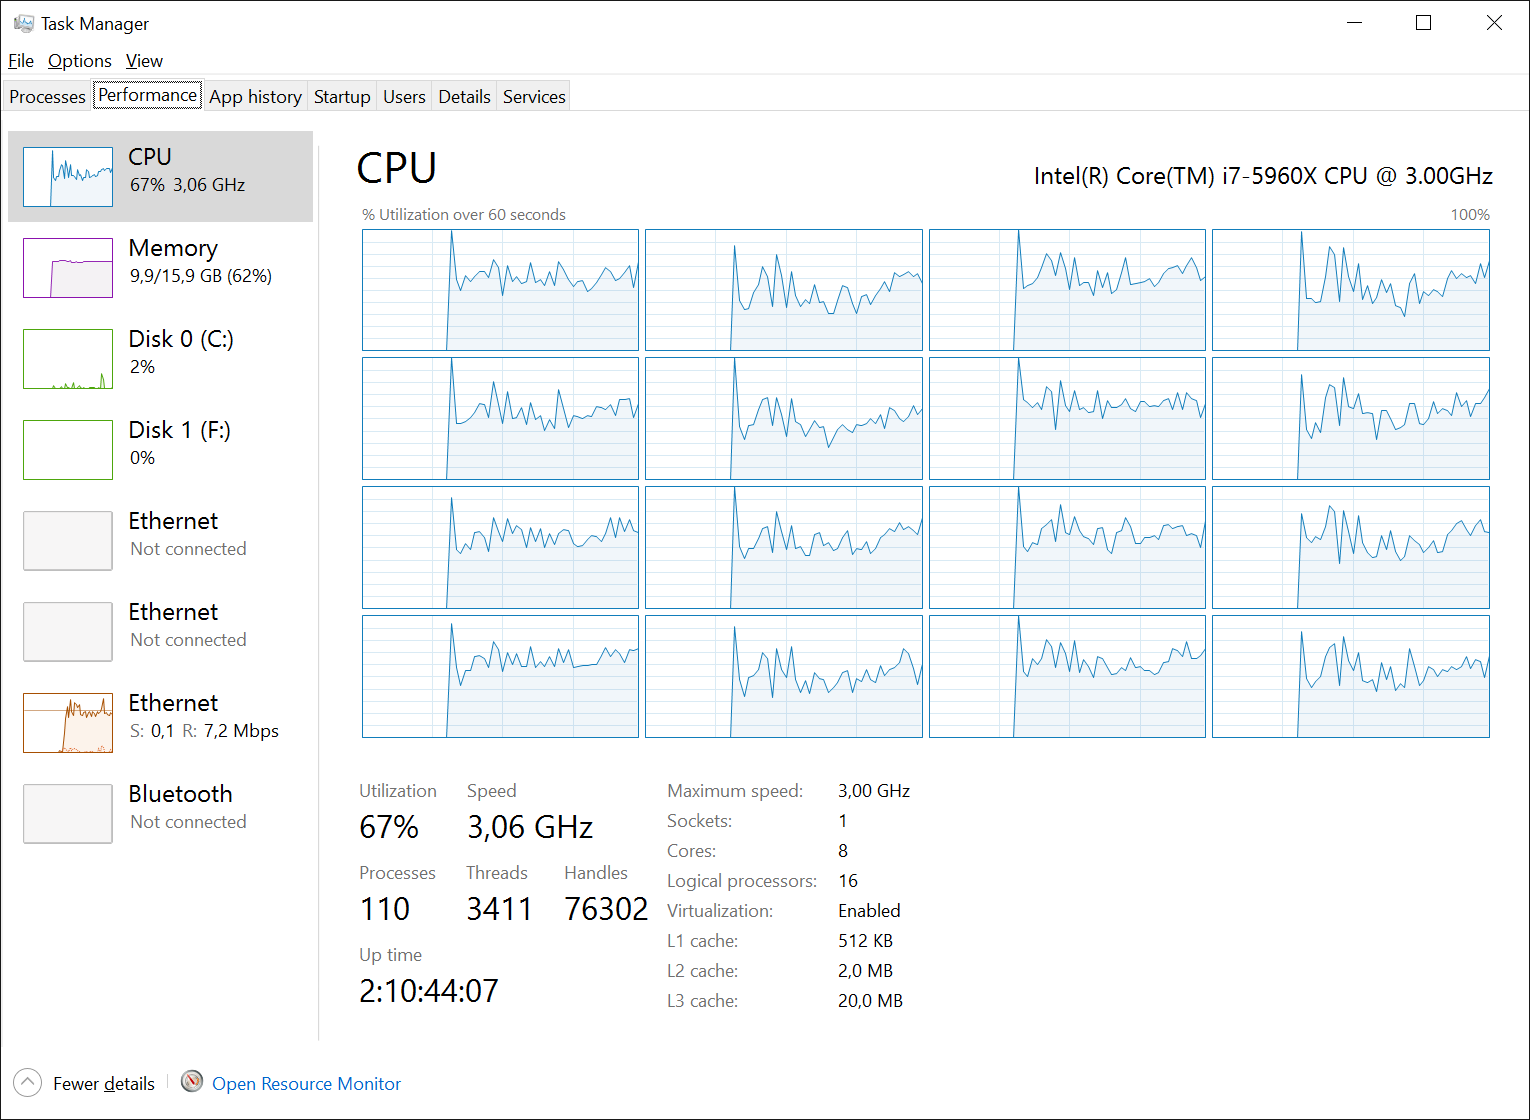
It’s really cool but you’ll need a powerful CPU to analyze your video. Look how my powerful Intel i7-5960X CPU was working hard for one of my videos to be processed:
The idea is then to rather use the power of the cloud. The Hyperlapse technology can indeed be accessed through Azure Media Hyperlapse.
But if you’d like to just do stabilization, your best option would be to use the Microsoft Cognitive Services launched during //BUILD 2016 which has a dedicated video stabilization feature.
Indeed, besides no time-lapse, the stabilization in Cognitive Services does use a slightly updated algorithm than the Azure Media Services Hyperlapse one. Since there is no time-lapse, audio can be also included with the stabilization output.
So, you’d like to know how to obtain the same results demonstrated at the beginning of this article?
It’s really easy! Just follow the below 5 steps instructions.
Note: it’s far better if you’ve got a developer’s background.
1 – Navigate to the home page of the Microsoft Cognitive Services and click on “Get started for free”
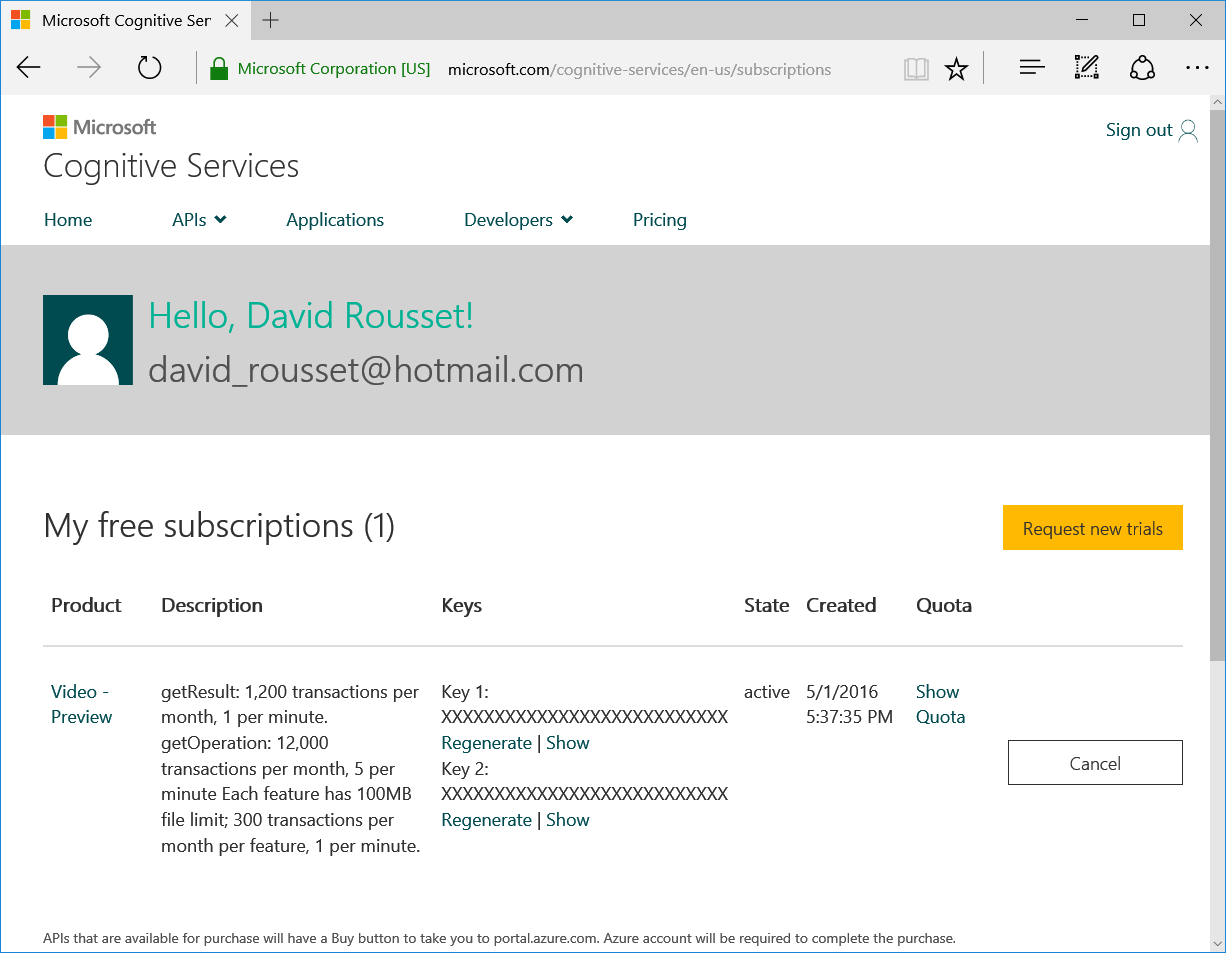
2 – Follow the registration process to “Request new trials” and requesting some keys for the “Video – Preview” service. You’ll end up with this screen where you can show your private keys and copy/paste them:
3 – Ok, you now need to upload your video to the Cognitive Services and process it. The documentation for the API is here where you can try the API via a testing console. You’ll notice that the current free service is limited to 100 MB videos. The best option is to use the Sample-WPF client available in the github repo. Download it from Github and open it with Visual Studio 2015 (the free Community Edition works).
4 – Compile the WPF client. nuGet should retrieve automatically for you the missing packages on your machine.
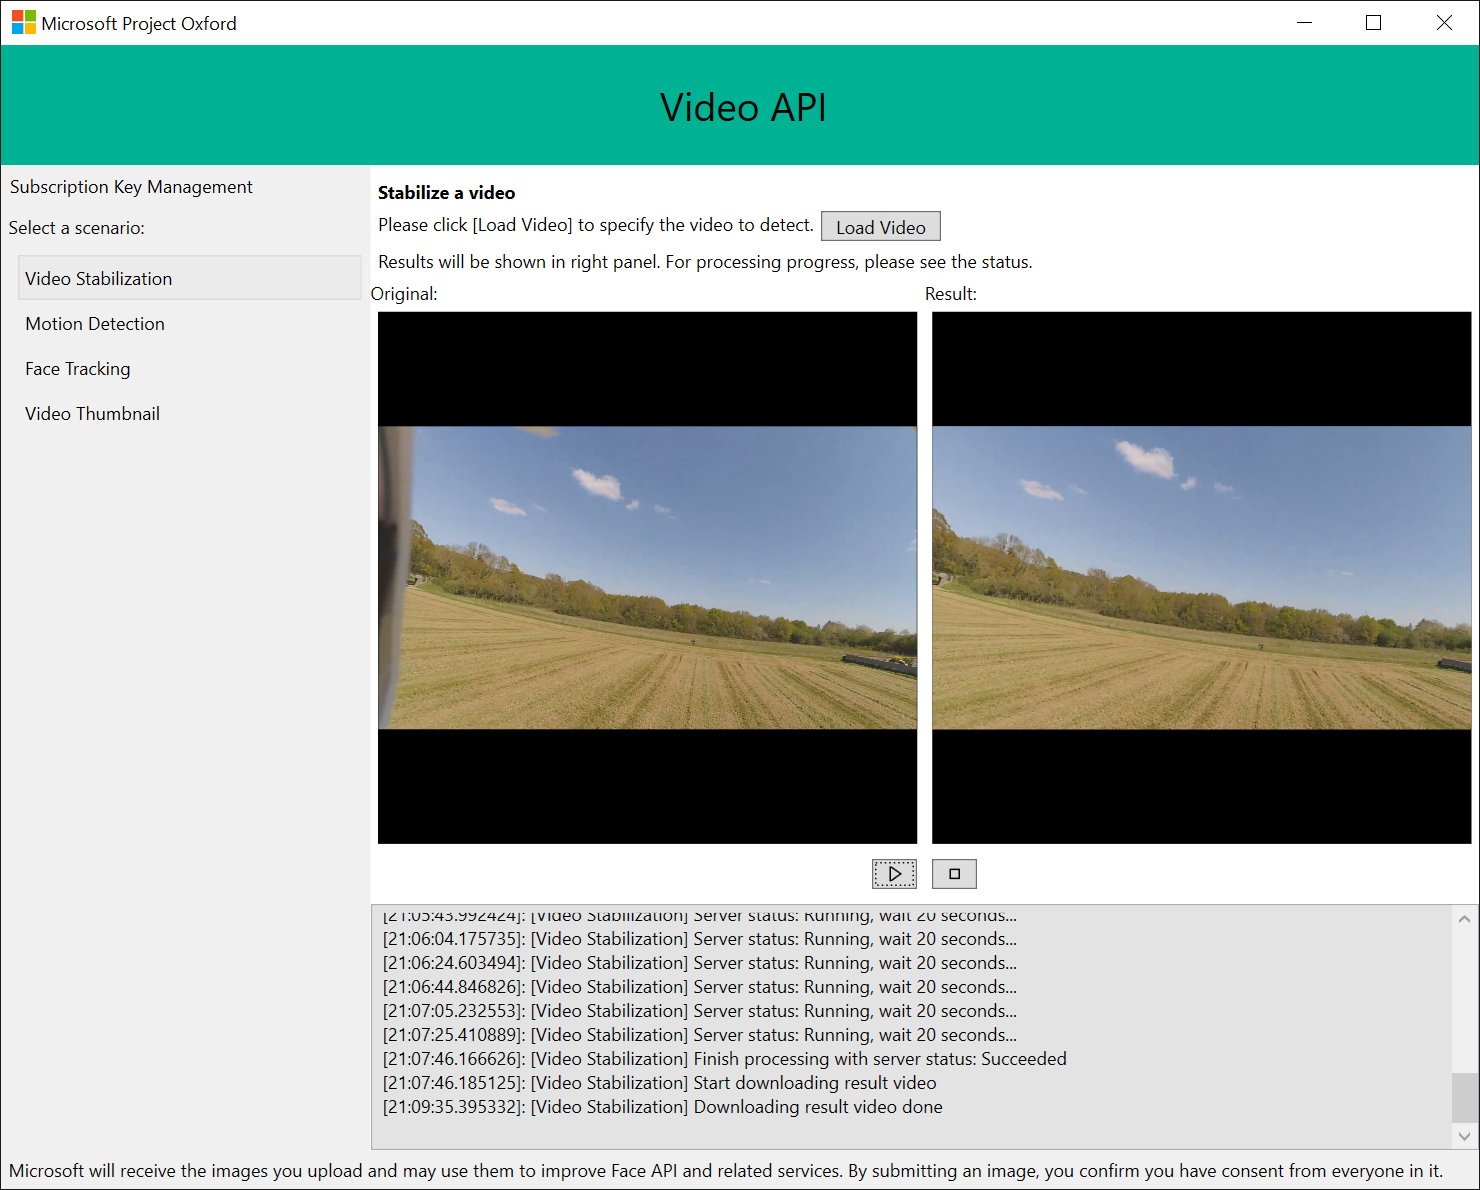
5 – Run the WPF client, choose the “Video Stabilization” scenario and click on “Load Video” to choose the less than 100 MB video you’d like to upload and process. You then just need to wait for a 3 phases process: uploading to the servers, cloud processing and downloading it back. For the 1 min 1080p/60fps video demonstrated in this article, I had to wait for approximately 15 min.
And you’re ready to enjoy magically stabilized videos! 🙂
Going further
If you’d like to know more about Microsoft Cognitive Services: